• Home
  • Lawn Mowing Service
  • Blog
  • Seeding & Lawn Repair
  • Snow Removal
  • Mulch
  • Lawn Care
    • Lawn Dethatching
    • Aerate & Overseed
    • Fall Cleanup & Leaf Removal
  • Landscaping
    • Landscape Maintenance
  • Contact Us

Evansville Lawn & Landscape                   812 459 2180

Affordable lawn care mowing and landscape services for the greater Evansville McCutchanville & Boonville area

CALL NOW

Tree & Shrub Pruning

6/24/2016

0 Comments

 
​There are many skills the new gardener must master, but pruning is one of the most essential. Without proper pruning, trees, shrubs, bushes and other plants can quickly get out of control, resulting in a great many problems down the road. Pruning has a number of important advantages, including promoting better flowering, promoting higher fruit yields, improving the appearance and health of the plants, maintaining the desired shape and controlling growth. Pruning also helps to remove dead, diseased and otherwise damaged parts of the plant, an essential part of maintaining a healthy garden.
 
At first blush pruning may seem like an easy job, consisting simply of cutting away the undesirable parts of the plant. Pruning is actually much more complicated than it appears, however, and it takes a trained eye and a steady hand to prune plants and trees properly. It is a good idea for the new gardener to enlist the help of a more experienced friend to learn how to prune most effectively. In addition, garden clubs can be great sources of information for this essential part of the gardening hobby.
 
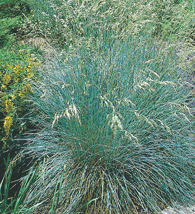
When to prune can be a challenge, but most non-flowering evergreen shrubs and trees should be pruned once annually, usually in the early spring, just as new growth is beginning to appear. Deciduous varieties of shrubs and trees should also be pruned once a year, generally in the winter when they are still in their dormant stage. It is important to prune those plants before their new buds have begun to appear.
 
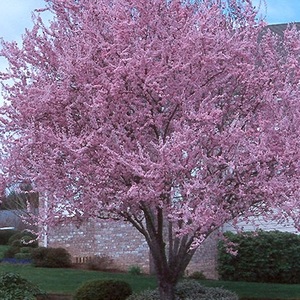
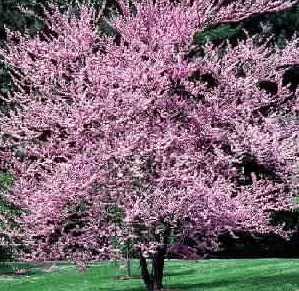
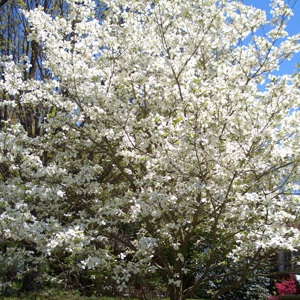
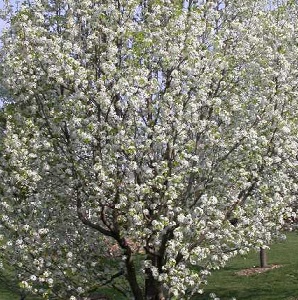
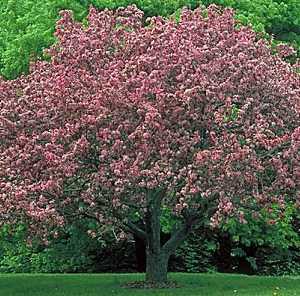
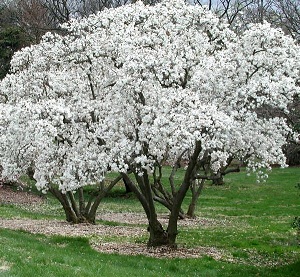
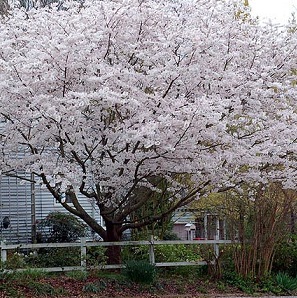
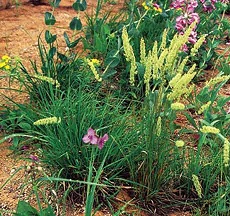
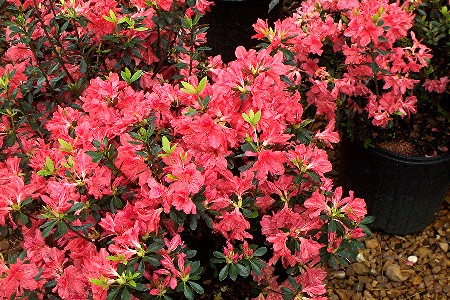
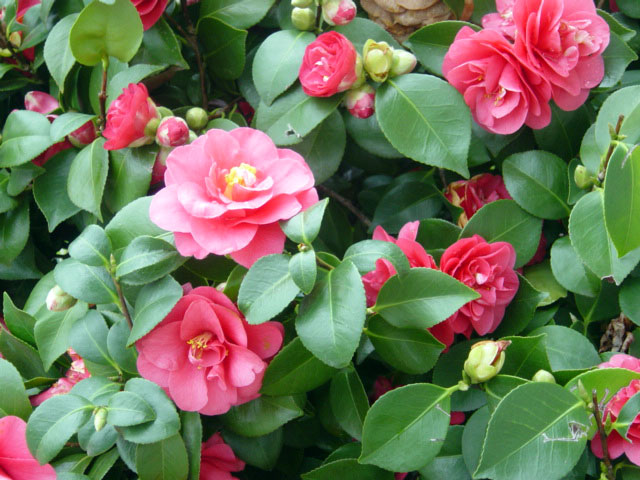
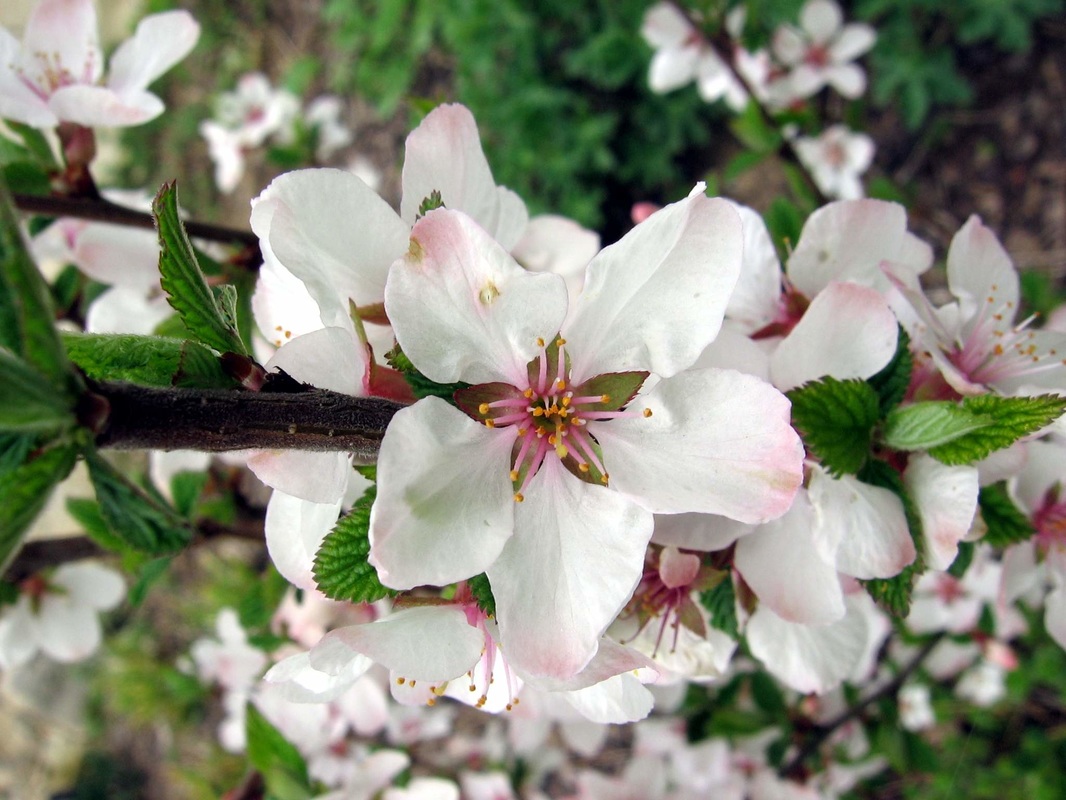
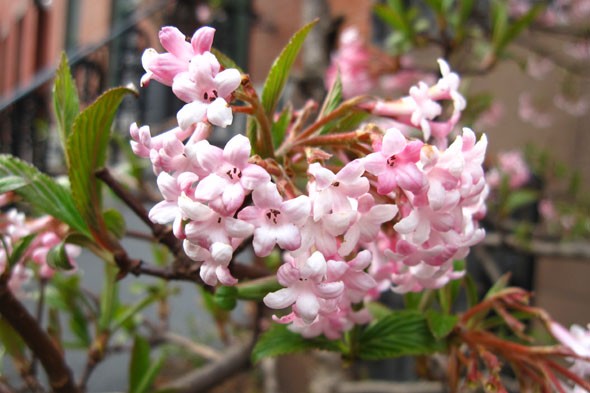
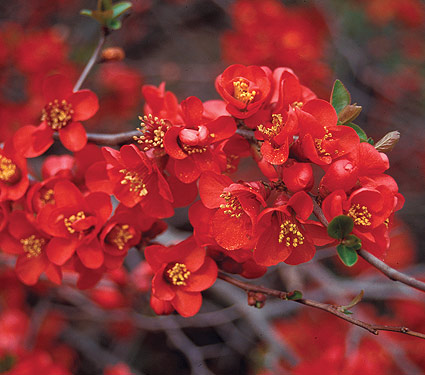
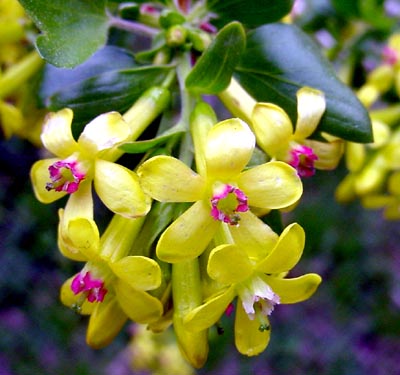
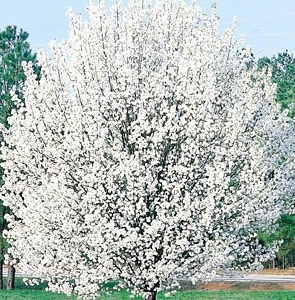
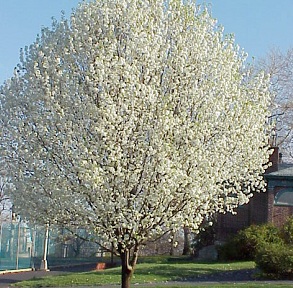
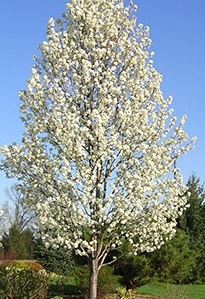
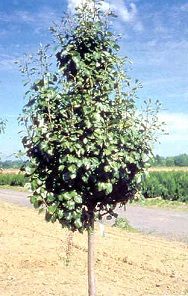
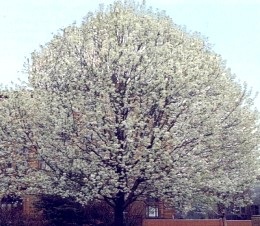
Most varieties of spring flowering shrubs and trees should be pruned right after they have flowered. If you wait too long to prune these spring flowering trees their buds will not have time to regenerate before winter arrives. Some examples of these spring flowering trees and shrubs include azaleas, honeysuckles, forsythia, rhododendrons, dogwoods and hydrangeas.
 
Some other varieties of trees and shrubs, such as butterfly bushes, bush roses, cranberry bushes and chaste trees, should be pruned in the late winter while they are still dormant. The procedure for pruning these trees is to pinch off the spent blossoms to help promote more flowering.
 
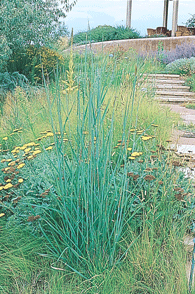
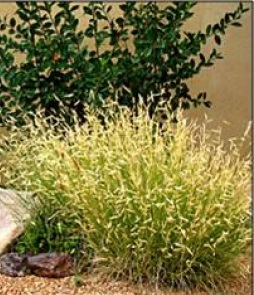
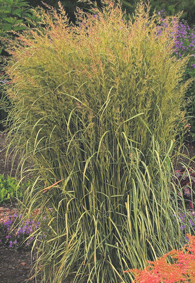
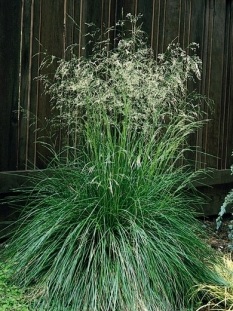
Hedges should be pruned in the late spring or summer, as soon as the new growth begins to appear. The top of the hedge should be pruned more narrowly in order to allow more sunlight to reach the base of the plant. This pruning will help to reduce thinning at the lower parts of the hedge.
 
Of course before you can do all this pruning you will need to gather the proper tools, and it is essential to have a good set of pruning shears on hand. Be sure that the blades of the shears are clean and sharp, as this will help to prevent damage to the plants. If the blades are dull the stems of the plants could be damaged during the pruning, and if they are dirty disease causing microorganisms could find an entry way into the plant’s interior. Many gardeners like to soak the blades of their pruning shears in a solution of water with a couple drops of bleach. The bleach in the water will help to kill off any bacteria or microorganisms that may have clung to the blades.
 
Pruning shears can be used to trim branches up to half an inch in diameter, while lopping shears will be required for branches larger than half an inch but less than two inches. Branches more than two inches in diameter will require a hand saw or bow saw to trim.
 
Begin your work by pruning back all of the damaged, diseased or dead limbs of the plant, making sure to prune back to the healthy branch. Any unwanted water sprouts and suckers can also be removed from the base of the plant. These fast growing shoots can steal nutrients that would otherwise be directed to flowering and blooming.
 

After the initial pruning has been completed, take a step back and look at the plant to determine if farther trimming is needed. If your desire is to train the plant to grow in a particular direction, be sure to trim the lateral branches to make this training easier. Take your time as you prune, stepping back often to look at the results.
0 Comments

How to Plant a Tree

3/20/2016

0 Comments

 
When to Plant
Two things are important to freshly planted trees - moderate temperatures and rainfall. Ideally, any plant will have time to acclimate and to establish roots in their new enviroment before being exposed to any extreme weather. For those reasons, the best times to plant a tree are very early in spring (before leaves start to form) or towards the middle of the fall (after leaves have stopped growing). At these times, most of the energy of the tree will be spent on root growth. This is not to say that these are the only time to plant - just when the conditions are the best to do so. Locally (Southern Indiana) and with proper care, we may start planting in early March and continue until late November. In areas farther south with milder winters, planting may be done at any time of year.

Read More
0 Comments

Mulching  Landscape Beds Shrubs and Trees

2/7/2016

0 Comments

 
As winter eases off and spring awakens, gardeners delight in long days spent outdoors watching their gardens come to life.  It's Landscape Time! Once landscape designs are complete, garden beds have been created and the planting of shrubs and trees has been tended to, your next task is to add a layer of good mulch.

Mulch benefits your garden in multiple ways.  One of the major benefits of mulch is water conservation.  Properly mulched beds retain 10 - 25% of the moisture normally lost through evaporation.  Secondly, it saves hours of unpleasant weeding by blocking the sunlight necessary for weeds to grow.  Mulch forms a protective barrier between your lawn mower, or weed eater, and the trees and shrubs that are bordered by your lawn.  Properly applied mulch insulates the soil in throughout the seasons, and prevents soil erosion.

What Types of Mulch Work Best?

Do-It-Yourself landscapers have a variety of options when it comes to mulch. Each has its own strengths and weaknesses.  Here is a list of some commonly used mulches with brief descriptions of their pros and cons:

Pine Bark

This is one of the most commonly used mulches and the one you see frequently in your neighbors' plant beds. A 2" - 3" layer is ideal.

Pros:  It is attractive and provides a dark aesthetic.  It can be purchased in a variety of sizes from shredded, which will be discussed later, to larger pieces - called nuggets.

Cons:  The larger pieces can attract termites and other insects which might make certain plant species vulnerable. Nuggets are light-weight, which means they can easily float away if over-watered or during a rain storm.

Pine Needles

Pine needles make a great mulch for trees and shrubs that like acidic soil, such as oaks, gardenias and hollies.  You will need about 2" for proper insulation.

Pros:  Great for plants that prefer acidic soils and allows water to easily penetrate.

Cons: Pine needles will kill eventually kill plants that do not like acidic soil. It isn't as attractive as other materials.

Shredded Hardwoods

This can be used just about anywhere.  It is a favorite for landscapers who want a soft natural look and can also be used on paths to prevent erosion.

Pros:  It decomposes slowly and is aesthetically pleasing.  It's one of the best weed suppressors. It does well on uneven landscapes and hillsides.

Cons: Over time, it can create a more alkaline soil. It compacts well, which eventually prohibits water penetration.  This shouldn't become an issue if it's not being walked on regularly.

Wood Chips

Different from pine bark nuggets, this is comprised of both wood and bark that has been chipped to various sizes.

Pros: Offers a variety of color to the plant beds.  Different sized pieces decompose at different rates, adding nitrogen to the soil in a "time release" fashion.

Cons:  Can attract harmful termites and other insects.

Crushed Stone, Gravel, & Pebbles

This can be an affordable mulching option, especially suited for desert or succulent themed landscaping.  2" usually provides enough cover.

Pros:  Allows water and air to circulate and doesn't decompose.

Cons:  Weeds can often make their way through it.  It can scatter onto sidewalks and into lawns without the right border.  It can also create an alkaline soil over time.

Landscape Ground Cloth

Made from plastic, paper, and other materials, landscape fabrics are a durable mulch option.

Pros:  Allows proper air/water circulation and is a good weed suppressant.

Cons:  Works best in conjunction with another mulch on top for optimal water conservation and week control.

Dyed Mulch

Dyed Mulches are relatively new on the market. They usually come in reds, browns, or blacks.  They are made from recycled wood products.

Pros: All the benefits of wood chips (see above).

Cons:  While dyes are usually vegetable based, the wood can come from treated wood sources, leaching undesirable chemicals.  Purchase dyed woods with the Mulch & Soil (MSC) Logo to ensure the wood is chemical free.

How to Apply Mulch

Once you've selected the mulching material you feel works best with your landscape design, it's time to apply it.

  1. Reign in your mulching enthusiasm until late spring to ensure proper soil temperatures. If you live in a cooler climate, you may want to wait even longer. Talk to your local nursery to verify "optimal mulching time" in your zone.
  • Ensure that all areas around the plants, shrubs or trees are weed free.  Consider renting a bed edger to create well defined edges, eliminate weeds, and save on manual labor.
  • Consider the soil beneath the mulch.  If you have a sandy soil base, you might want to add a little extra mulch to preserve water.  If you have a rich soil with poor drainage, you might want to keep the mulch on the lighter side to prevent root rot. You may not even need mulch if the soil retains moisture.
  • Consider the root zone of the plants you are mulching.  For flower beds, you should mulch the entire bed area. For trees and shrubs, you want to mulch anywhere from 3' to 6' out from the shrub/tree, depending on the size of the root base.  Make sure to leave a few inches of free space between the mulch and the bark on the shrubs/trees or the bark can rot from trapped moisture.
  • Don't over mulch. Some gardeners get a little overzealous with their mulch application.  Too much mulch is a bad thing.  Roots can begin to grow into the mulch, rather than soil, which makes them vulnerable to fertilizer and pesticide damage.
Applying mulch to plant beds and pathways benefits any landscape.  Once the initial hard work is over, mulch maintenance is easy. Enjoy your newly mulched, water savvy, and weed free garden landscape.
​
0 Comments

Low Budget Small Area Landscape Design Ideas

2/3/2016

0 Comments

 
How can you do a small area landscape DIY that makes a big impact on a small budget? The good news is that low budget small area, landscape design ideas are actually easier to do successfully than if you are trying to landscape a larger area.  Here are 10 landscape DIY design ideas that are budget-friendly:

1.  Start with a Focal Point
Especially in a smaller area, a garden feature focal point like a bird bath, a cluster of bird feeders, a fountain, a statue, a large vase, or a group of potted plants helps to create a Centerpoint that pleases the eye.  You can also use a table and chairs, or a trellis and vine, or a set of birdhouses. Want a theme garden? .  Choose an old rusted bicycle for a country look, or a set of large stones for an Asian garden.

2.  Use What You Have
Do you have some trees or bushes already?  You can use those to help create your focal point background for building your garden. Before you rush out to buy something new, save money by considering what you already have that you can use in your garden.  Do you have some pots, baskets, old pottery or chimes in your storage?  Be creative!  Pottery that is too broken to use to hold water might still work as a garden decoration.  You can also visit garage sales to find unusual items like old weathered windows or garden benches.

3. Use Container Clusters
Planting in containers has the advantage of using less soil, being easier to water and also being able to be moved around.  Especially in small spaces, containers let you plant a lot and change plants out which are not blooming, moving the nicest ones where they can best be seen.  You also might want to consider keeping your plants inside inexpensive plastic pots which can be moved in and out of different containers.

4. Ask Gardener Friends to Share
In pioneer times, people didn't have stores to go to in order to get plants.  Everyone shared the flower seeds or bulbs they had growing with their neighbors.  In fact, some of the best plants you can grow are ones that other gardeners have growing in abundance.  Especially if you aren't sure of your landscape DIY skills, you might want to cultivate some gardening friends and ask if they have seeds, cuttings, bulbs or plants they can share.  They may also have advice of local places which offer good deals.

6. Visit the a Local Arboretum
Many times, you can develop ideas for your garden by looking at other gardens. Do you have a local arboretum, or gardens at a University?  Visit them to get ideas.  Some gardens even have plant sales or classes about how to grow local native plants.  If you don't have gardens to visit nearby, you can check out gardening books at the library or look for pictures of gardens of the tye you like online.

7. Buy for Every Season
Part of successful landscape DIY design is careful planning so that you have plants blooming at different times.  So when you start buying plants and seeds, look to see when the plant blooms and be sure to pick out plants that bloom in the spring, summer, and fall.  Bulbs look very unattractive when you stick them in the ground, but they are often fabulous for creating sustained, beautiful floral displays in the early spring.

8. Think Local.
Every plant counts in a smaller garden, and if you are starting your landscape DIY from scratch, you need  plants which will grow and thrive quickly.  How can you do that?  Make sure every plant you buy is well adapted for your area climate zone.   Moreover,  you might want to look for native local plants which often grow the most vigorously and require less care.

9. Plan for the Birds
An inexpensive way to add interest to your small garden is to add features to attract birds.   You can make a birdbath or bird feeder out of any large ceramic platter set in the ground, or on top of an upturned garden pot.  Add a birdhouse or two also!  You may get some permanent guests.

10. Attract Butterflies
Nothing adds more interest to a garden than butterflies floating by.  You can attract them by planting the right combination of plants they like to eat as adults, and plants they lay eggs on and eat as caterpillars.

Finally, enjoy the process. Creating a landscaping DIY garden is something you can enjoy doing over the period of a year or more.  Even better, it is something which can grow, change and evolve into an outdoor room which expresses your own personality, as well as provides a tranquil place for reading, relaxing and entertaining.
​
0 Comments

Low Maintenance Landscape Plants

1/17/2016

0 Comments

 
With the possible exception of some desert Southwest yard comprised of gravel and a few scattered cacti or a suburban back yard completely covered with artificial turf,there is no such thing as a maintenance free home landscape design.Even the hardiest, most drought-resistant plants require some care and attention in order to grow and thrive. However, whether you're a landscape DIY-er starting from scratch or altering or adding to an existing landscape,a bit of planning and research can help you select attractive and vibrant trees, flowers and shrubs that are drought and insect-resistant and require a minimum amount of attention. A few popular varieties are described below. Each is suitable for cultivation in southern Indiana, which, is in a USDA transitional hardiness zone between 6b (average low temperature between -5 and -10 degrees F.)and 7a (0 to -5 degrees F.)

Flowers

BlackEyed Susan –

Also known by a number of other names, this familiar plant's varieties included, perennials and biennials, all of which share a bright yellow or orange flower with the characteristic center black spot or“eye”. Several varieties are native to the Midwest, and nearly all can be grown easily from seeds. Black-eyed Susans prefer full sun, but can grow quite well in partial shade.

Aster–

Although there are over 180 known species of asters, only a subspecies of the Alpine aster (Aster alpinus) is native to North America. The aster plant typically grows to between 6 and 12 inches and produces lavender, blue, pink, purple or white colored dainty flowers. The Alpine aster is drought and insect-resistant exceptionally less prone to insects or diseases and it makes them an ideal low maintenance perennial plant. 

Daylily–

A tall perennial that produces ornate flowers on tall stalks,daylilies establish themselves in clumps of thick, dark green foliage and are often used as floral borders. They will grow in a variety of soils and, while they do best in full sun, they can tolerate partial shade.

Sedum-

Also known as stonecrop, these are succulents known for their hardiness. A number of varieties thrive in areas that receive too much sun for many plants and, because the leaves store water, sedum tend to need watering less often than other plants. 

Bloody (or Bloody Cranesbill) Geranium -

Although we tend to think of geraniums as annuals, this variety is a hardy perennial featuring pink flowers in summer. In fall, these turn to the bright crimson shade that gives this variety its names. It usually grows 6-10 inches tall and about 12-14 inches wide and does best in rich, moist, but well-drained soil.

Trees

Velvet Cloak Smoke Tree –

The smoke tree grows to a height of 1015 feet and width of 15-20 feet. It can be pruned and trained to grow as either a large shrub or small tree. It is deciduous, with deep purple leaves and puffy pink flowers that appear in the early summer and grows best in full sun and well-drained soil.

Thornless Common Honeylocust –

Another deciduous tree, this one with fern-like golden compound leaves and tufts of white flowers in spring. It requires full sun but will tolerate a wide variety of soil types.

Winter King Hawthorn –

An upright small tree with clusters of white flowers in spring. Though deciduous, it grows bright red fruit through winter and will sometimes sprout thorns. This variety needs full sun and good air circulation, along with well-drained soil rich in compost or other organic material.

Shrubs

Endless Summer (or “Bailmer”) Hydrangea –

A deciduous shrub with lime green flowers that change to pink during summer, its popular name is derived from the fact that blooms can appear on both the current year's and prior season's growth. The Bailmer tolerates most soil conditions and grows best in full sun to light shade. Experienced gardeners whose yards are frequented by Bambi and his relatives know that hydrangeas are a deer delicacy and are best grown in areas that are difficult to access, such as an elevated deck.

Bowles Golden Sedge -

An evergreen clumping perennial, the Golden Sedge features yellow-green variegated foliage and will grow to approximately 28 inches tall by 18 inches wide. Though it will tolerate nearly any light condition, its color is more vivid when it is planted in a full sun area.

Rose Glow -

A larger shrub (mature plants can reach 3-5 feet in height and 3-4 feet in width), this is a mounding, deciduous plant with red leaves and delicate white and yellow flowers, as well as thorns. As with the Golden Sedge, while it will tolerate most light conditions, its foliage is more vivid when grown in full sun.
0 Comments

Caring for Your Warm-Season Grass Lawn

8/6/2015

0 Comments


If you live in the southern sections of the United States, you probably have a warm-season lawn. Some examples of warm-season grass are Bermuda, buffalo, carpet, centipede, Bahia, St. Augustine, and Zoysia.

Warm-season grasses grow best when the temperature exceeds 80ºF. During the winter when the temperature drops, these grasses will go dormant and turn brown. Many southern gardeners will “overseed” their lawns during the winter by seeding their existing lawns with a ryegrass each fall to ensure their lawn stays green throughout the winter. 

Warm-season grasses are trickier to maintain than cool-season grasses. Therefore, it is important to choose the best type of grass for your soil type. Otherwise, your lawn will quickly be overrun with weeds or unwanted grass varieties. On the up side, warm-season grasses are more durable and require less watering than their cool-season siblings. Typically, watering will only need to be done during the winter if the season is extremely dry. 

To reduce the necessary maintenance level for your lawn, it is important that you start out with good soil and maintain the ideal growing conditions for your grass type. Generally, this starts with having your soil tested. Testing the soil will ensure that you are fertilizing correctly and help you understand which grass is best for your area. 

Warm-season grasses should be planted in the late spring and should not be planted in the late summer or early fall. Planting them too late in the season does not give them enough time to develop before going dormant. 

Fertilizing should begin in May and continue about once a month until September. If you fertilize too early, the grass will still be dormant and the only benefits will be for the weeds. If you fertilize after September 1, you could delay the natural dormancy of the grass. Fertilizing in May should be done with a product that contains thirty to fifty percent of the nitrogen in a slow-release form. 

In February, plan on using a good pre-emergence herbicide to help control weeds. This will ensure that the herbicide has a chance to kill the weeds before they have a chance to germinate and establish. In March, you will need to remove any excessive thatch that has developed and can be a problem for warm-season grasses. 

Mowing for most warm-season grasses should begin when it is about 1-1/2 inches high. Buffalo grass should not be cut until it is longer, at least 3 inches high. They will also need constant trimming and edging, as many warm-season grasses have the tendency to creep. 

0 Comments

The Magic of Mulch

7/28/2015

0 Comments

 
Mother Nature herself does a pretty good job of mulching natural areas: She shakes pine trees so their needles sprinkle over the ground underneath and slow the growth of nutrient-robbing weeds. She nudges old bark off of trees and speeds the decomposition of their discarded leaves to slow the evaporation of her rainfall from the ground. Her winds dislodge dry twigs and faded flower petals to keep new growth warm during winter’s promised cold.

As they create their own private gardens and woodlands, gardeners and landscapers follow her example by mulching their new plantings — shrubs, trees, vegetables, ground cover, and annual and perennial flowers — with the same organic materials that she uses: materials produced during plants’ natural life cycles. 

Why mulch?
In order to thrive, new plantings need every advantage for a healthy start. Sadly, new home developments usually undergo heavy backfilling and grading that alter the naturally occurring proportions of air, moisture, and organic matter in the original soil. Fortunately, over successive years the life cycle of the healthy new plantings slowly recreates ideal soil conditions as it dies and decays. Mulching can accelerate the process.

Organic and inorganic mulching help retain optimal growing conditions in soil by:
· Smothering weeds, so that desirable plants have less competition for water and nutrients. 
· Slowing evaporation, extending the time moisture is available to thirsty plants. 
· Keeping the soil temperature even by preventing harmful fluctuation during hot and cold extremes.
· Protecting trees and shrubs from injuries inflicted by weed cutters and lawn mowers.

Organic mulch
The most common types of organic mulch are: 
· Grass clippings 
· Pine needles
· Pine, cedar, and other hardwood tree bark 
· Wood chips
· Shredded leaves
· Cocoa bean shells
· Pecan shells
· Ground corn cobs
· Household compost
· Mushroom compost
· Straw

Inorganic mulch
Inorganic mulches, materials that were never part of a living plant or tree, also have a place in landscape projects. Popular inorganic mulches include:
· Pebbles
· Gravel
· Lava rock
· Crushed stone
· Plastic sheeting
· Shredded tires
· Newspaper
· Woven landscape fabric

Selecting mulch
Each type of mulch offers specific advantages and disadvantages. It pays to understand as much as you can to prevent wasting your time, energy, and money. 

Organic mulch contains living organisms that interact with a plant’s roots to give it the best possible boost toward a long and healthy life. As it decomposes, organic mulch continues to add nutrients to the soil, creating rich topsoil and preventing soil depletion. (Depletion is one reason why farmers who plant fields devoted to a single crop must let their fields lie fallow over a planting season — there isn’t anything left in the soil to produce healthy crops.) Because it can be worked into the surface soil, organic mulch limits soil crusting and compaction, which results in rainwater runoff and erosion and prevents nutrients from reaching plants’ roots. Organic mulch also encourages denser root growth because new roots can grow into the mulch itself. 

A few cautions about organic mulches:
· Grass clippings must be relatively weed-free and dried out to prevent matting.
· Clippings from herbicide-treated lawns should not be used. 
· Cypress bark mulching is discouraged by many who fear its threat to southern cypress wetlands in states like Florida and Louisiana.
· Organic mulches provide food for birds, insects, and occasionally vermin.
· They naturally decompose, necessitating replenishment every year or two.  
· Large pieces of bark will float away during heavy rain; shredded is preferable, especially on slopes.
· Compost decomposes quite rapidly.

On the other hand, inorganic mulches have the advantage of not decomposing, necessitating frequent replacement; and not attracting insects and vermin. Pebbles can be worked into the soil to lessen the risk of compaction. And inorganic mulches can be used effectively to prevent weed growth and mud in otherwise unplantable soil under decks, steps, and storage areas. Many inorganic mulches are not as effective in regulating soil temperature, however, because they tend to absorb the sun’s rays.

Organic and inorganic mulch can be purchased at garden centers and hardware stores, by the bag or in bulk. Some kinds, such as shredded tree limbs, are available at no cost from electric utilities and municipalities. Mulch sales are also popular fund-raisers for students and young people’s organizations. 

Through thoughtful mulching — using organic materials whenever possible — gardeners can become an indelible part of nature’s reproductive life cycle. After all, today’s heirloom seeds are the hand-me-downs of tender, lovingly cared-for shoots from another century, maybe even another culture.  


Mulch is about more than cosmetics; it contributes to the natural life cycle of trees, shrubs, vegetables, ground cover and flowers, and fosters the healthy growth of desirable additions to the humblest garden plot and most extensive landscape design.
0 Comments

Landscaping on a Budget

7/21/2015

0 Comments

 
By J. E. Davidson


You can have a beautiful lawn that rivals your neighbors’ at a fraction of the cost of professional landscaping when you are willing to do some of the labor yourself and follow some of these money-saving tips.


Many homeowners obsess about the state of their lawn grass, using expensive and potentially toxic chemicals to destroy weeds and fertilizers to feed the grass. Lowering your standards a bit can create a healthier lawn naturally. Leaving a few weeds in can add nitrogen to the soil. Legume plants such as clover have roots that are colonized by certain bacteria which extract nitrogen from the air. When the bacteria are finished with the nitrogen it becomes available to the cover crop, and when the cover crop is tilled under the nitrogen becomes available to your yard and garden plants.


Clean water is becoming a precious commodity and watering your lawn can be an expensive part of your lawn care. Planting drought-resistant plants and xeriscaping can reduce the amount of watering needed. Xeriscaping is the creation of a landscape that can withstand drought conditions. Most drought resistant plants will tolerate poor-to-average quality soil and some even prefer poor soil. Landscape features such as rock gardens, ornamental grasses, extended patios, walkways and native wildflower gardens can reduce the amount of watering and fertilizing your lawn requires. Some plants such as hens & chicks, aloe, and stonecrop are great choices for a drought-resistant garden. Plants native to your zone will also require less water and attention. Low-growing ground covers will cost more up front but will require less maintenance than turf grass.


Make grassy areas an accent instead of the main element of your lawn or make some aesthetic concessions and plant grass that is tolerant of dry conditions. Plant grass seed instead of paying premium prices for sod. Grass seed will take about six months to become established but will germinate and grow quickly.


Water your lawn more precisely by installing an automatic irrigation system. Drip-type systems can be easily installed by a do-it-yourself homeowner, but sprinkler types may require professional installation. Automatic irrigation systems will have an initial up-front expense but will save money on watering in the long run since the water can be directed to a targeted area.


Save money on plants by purchasing them at a discount store such as Walmart instead of at a nursery. The plants will be of lesser quality but with a little care can become as beautiful as expensive nursery plants. It may take time to sort through the discount plants to find suitable specimens. Take someone with you who is knowledgeable about plants, if you aren’t, and choose plants that are pest-free. Plants will also go on sale at the end of summer. If you have time to give cheaper plants a little TLC they can save you a good bit of money. Make a plan for your garden and buy only plants that fit into your plan to avoid impulse buying!


Water features can be an inexpensive way to make an impact on your landscaping. Many home supply stores have do-it-yourself pond liners and water pumps to create attractive pond and waterfalls. Modern pond supplies make it an easy DIY project. You may be able to find some free stones at a construction site (ask first) or a friend’s home in the country.


Make your own fertilizer by composting kitchen scraps such as fruit and vegetable peelings, coffee grounds, and egg shells (no fats, animal waste, or diseased plants), yard and garden clippings, leaves, woody brush, sawdust, and shredded newspaper. You can buy compost bins, make your own, or just let it decay in a big pile in an out-of-the way corner of the yard. Covering the pile with a tarp will keep the heat in to speed up the process. Work the decomposed matter into the garden soil. Compost can also be used as a mulch. Some cities offer free compost from vegetation removed by the street department work crews.


Rent or borrow tools you only need occasionally, like chipper/shredders, rototillers, chain saws, and power washers, or chip in with family or neighbors to buy tools that you can share.


Growing fruits and vegetables in your landscape will also save dollars at the grocery!


0 Comments

Tough Plants for Tough Places:  Clay Busting Plants

7/14/2015

0 Comments

 
Ah, the glory of clay!  The potter's delight, it can be made into anything, except a beautiful garden.  Or can it?  From Connecticut to Georgia; from Arizona to West Virginia, most native soil is clay, clay, clay.  No need to panic!  Those new home sites and the backyard pile of rubble, left over after the county put in the new sewer line, can become a lush haven for many trees, shrubs, and perennials.  If you can work it, and you maintain the surface moisture level during dry periods, many clay busting plants will not only grow, but they will flourish, and do so rapidly.

The following is a list of my favorite clay-loving plants:

Trees:

Thuja 'Green Giant' (Thuja)  This western red cedar cross is one of the fastest growing conifers in the world.  Its foliage is a lush, deep green, and it grows at an amazing rate of 3 to 5 feet a year.  Its heavenly scented evergreen branches ascend gracefully, and it never needs trimming.  It is an ideal choice for a privacy screen.  Very long lived, 'Green Giant' is deer, pest, and disease resistant.  A real traffic stopper, this lovely evergreen will grace your yard for generations to come.  Height 30-50 feet.  Full sun to light shade.  Zone: 5-9.  

River Birch (Betula nigra)  This fast growing native birch loves to keep its feet wet, survives for weeks in standing water, and it is immune to the bronze birch borer, which has blighted and killed many stands of birch trees in the middle Atlantic and south eastern states.  River Birch loves low swampy places, and its thirsty roots blast through tough clay soil.  The peeling bark of mature trees and the beautiful gold autumn color make this graceful tree a lovely addition to the landscape.  Grows to a height of 90 feet at maturity. Full to part sun.  Zone 3-9.  
 
Eastern White Pine (Pinus strobus):  This beautiful pine, with its blue-green needles, has it all.  It will grow anywhere, thrives in clay soil, and can even tolerate wet swampy areas.  Fast growing to 100 feet, it will tower above a one story house in ten years.  It is excellent for a specimen tree or windbreak, and the birds love it for nesting and food.  It is widely used for Christmas trees and timber, but it also can be sheared back for the smaller yard.  Full Sun to part sun.  Zone 3-8.

Bradford Flowering Pear (Pyrus calleryana 'Bradford'):  This clay-loving flowering tree is a not to be missed addition to your yard.  Its tiny pear fruits are preferred by cardinals and mocking-birds, and it is loved by all birds for its sheltering branches.  It is the first tree to bloom in the spring and the last to shed its leaves in the fall.  The leaves are a perfect leathery green in the summer, turning to a deep, burgundy red in autumn.  Bradford is a fast growing tree that will soar over your house within 10 years.  Plant in full sun or part shade.  Height: 50 feet.   Zone: 5-9

Eastern Redbud (Cercis Canadensis)  The purple-red, tiny grape-like blossoms of the redbud explode along every branch of this small under story tree in spring.  It’s a breathtaking sight to behold on hillsides and in forest glades.  This is a tree that deserves to be planted enmasse.  From two year seedling to full-bloom takes about 5-6 years, and it is well worth the wait.  After bloom, the heart shaped leaves appear delicate and shiny.  Beautiful in the dappled shade of taller trees, Eastern Redbud thrives in clay soil, and its roots grow rapidly, but are non-invasive.  Grow in partial shade or full sun.  Zones:  4-9.

Flowering Crabapple (Malus)  Few flowering trees can compete with the glorious blooms of the flowering crabapple.  From pink to white to deep rose, the blooms of this magnificent tree will tantilize from early April to late May, depending on the cultivar.  The leaves are a leathery, healthy green in summer, and the fall color deepens to a rich burgundy in autumn.  Tiny green to red “apples” appear nestled amongst the leaves all summer and into fall.  They cling to the branches creating winter interest, until the birds eat them.  My all time favorite flowering crab is Malus Scarlet 'Brandywine' which has blooms that are sweetly fragrant and look like little roses.  Full sun.  Zones:  4-9.

Shrubs:

Japanese Barberry (Berberis thunbergii)  A much underappreciated deciduous shrub, the Japanese Barberry is truthfully a beautiful specimen of a plant.  With lush burgundy foliage, thorny stems, and bird friendly fall berries, the barberry is a perfect living fence.  Truly a plant with 3 season interest, in fall this incredible shrub turns a fiery red.  Carefree and not at all fussy about soil, the barberry grows to a height of 6 feet, untrimmed.  It also can be pruned to as little as 2 feet.  Pollution and drought tolerant, it is disease and pest free.  Full sun to light shade.  Zone:  4-8.
  
Butterfly Bush (Buddleia):  Also known as the summer lilac, the gorgeous flowers of the heavenly scented butterfly bush are hummingbird and butterfly magnets.   The long flower trusses give a never ending show from summer right into fall.  Plants can grow to a height of 10 to 12 feet, although it is recommended that they be cut back to 10 inches in late winter or early spring to promote lush growth and more flower power.   There are many choices available, from Buddleia 'Strawberry Lemonade' with its variegated foliage and deep pink blooms to the towering honey-scented 'Davidii Black Knight' with black-purple blooms.  For smaller  yards, diminutive 'Purple Emperor' grows to a height of  3-5 feet.  Buddleia grows very rapidly without special care.  Height varies from 5-12 feet.  Plant in full sun to part sun.  Zone:  4-9.

Lilac (Syringa vulgaris)  Speaking of lilacs, nothing shouts spring quite like the lavendar trusses of the sweet smelling lilac.  Syringa in all its glory is breathtaking planted enmasse, and there are hybrids that bloom in an array of colors, from primrose yellow to purple to white.  Space 6 to 12 feet apart in full sun.  Mulch heavily yearly, preferably with well-composted manure, and do not prune.  Merely remove spent blossoms, and lilacs will bloom heavily year after year.  The disease resistant and fragrant Vulgaris 'Blue Skies' also grows exceptionally fast in the south.  Height from 6 to 12 feet.  Full sun.  Zone:  4-9.

Hardy Beautyberry (Calicarpa dichotoma)  This enchanting shrub offers charming pink blooms and late summer to fall irridescent purple berries, which can hang on all winter.  Grows very quickly and blossoms and berries the very first year.  The beautyberry is not fussy about clay soil, as long as it is well drained.  With moisture seeking, deep roots, this lovely, disease free shrub will laugh at drought and bless your yard for years to come.  Grows well in sun and dappled shade.  Height 6-8 feet.  Zone:  5-8

Nearly Wild Rose (Rosa rugosa)  Whoever said that roses don't grow in clay has never met Rosa Rugosa.  This nearly wild rose grows rapidly in any kind of soil.  Its single to double petaled blooms are magnificent and sweet smelling.  But watch out!  This rose has thorns, making it a desirable living fence or screen.  Blooms in spring and into summer, with one last flush of bloom before frost in the fall.  Beautiful bright red rose hips hang on for winter interest.   Height 6-8 feet.  Full Sun.  Zone:  4-9.

Perennials:

Shasta Daisy (Leucanthemum x. superbum)  Who can resist a wall of romantic white or yellow daisies?  With delightful perfection, lasting for weeks in a vase, the Shasta Daisy  brings to mind those lovely childhood summers of chasing butterflies through meadows filled with wildflowers.  Today there are even more wonderful cultivars to choose from.  'Highland White Dream' grows 3 feet tall.  It is an extra long-blooming beauty which has double blooms an incredible 4-5 inches wide.  'Sonnenschein' is a two-toned yellow daisy which delights the eye from summer to fall.  It grows 24-30 inches tall.  Dwarf 'Snowcap' is perfect for the smaller yard.   At 12-18 inches high, it still sports large, white blooms that are an astounding 4 inches across.  Totally weather and heat resistant, these perfect specimens laugh at clay soil and repay your efforts a hundred-fold.   Full sun.  Zone: 4-9.

Gayfeather (Liatris)  These showy plants bloom a rich purple on towering feathery spikes, often 4-5 feet tall.  Irresistible to butterflies and hummingbirds, Liatris is magnificent when interplanted with vibrant lilies and shrub roses.  They bloom from the top down, and they multiply year after year.  A smaller cultivar is Liatris 'Kobold' which grows 24 inches high.  Give these knock-out plants plenty of room, and they will reward you with beautiful blooms and lush foliage year after year.  Full sun/light shade.  Zone: 3-10.

Daylilies (Hemerocallis)  Today's daylilies are a far cry from the field lilies of yesteryear.  These beautiful hybrids, many rebloomers, come in a breathtaking array of colors from white to yellow to pink to deep purple.  Two of my favorite daylilies are 'Rainbow Candy,' a creamy white, edged in purple, with a purple and yellow eye-zone; and 'Clothed in Glory' which has ruffled gold edges accenting dusty pink petals.  The list of beautiful new daylilies grows exponentially every year, and they are breathtaking planted enmasse on a slope.  Buy the largest bare roots that you can afford.  The bigger and healthier the roots, the larger and more floriferous they will be.  Best in full sun, but still blooms in dappled shade.  Zone:   3-9.

Coreopsis (Coreopsis spp. and cvs.)  For all those fill-in-the-blank spaces in your garden, nothing beats the cheery coreopsis.  Tiny daisy-like blossoms, in shades of pale yellow to gold to pink to red, eclipse the foliage in summer.  Thread-leaved varieties daintily hug the ground and spread quickly, laughing at heat, humidity, and drought.  Broad-leaved varieties form clumps which bloom in late spring to early summer.  'Limerock Ruby' a new deep red variety, has become a sensation with its velvety petals.  Plants can easily grow from seed in spring, blooming the following year.  Established plants can be bought through your local garden nursery.  Grows 6-24 inches high. Full sun. Zone: 4-9.

About Clay Soil:  Clay soil has the tiniest mineral components of any soil.  When clay is wet, it is as slippery as ice.  Clay is not a sterile soil.  It is actually high in nutrients, and it is usually very slow to drain.  Clay soil is the coldest soil, and the slowest to warm in the spring.  When clay is sun-baked and dry, it becomes like concrete.  It is then impossible to work.  Always plant in the spring, if you have clay soil, when the ground is easiest to work.  Mix in peat and other soil amendments within the planting hole.  In the fall you may plant safely if your summer has had enough rain and you do not allow the top 3 inches to dry out.

After Planting:  Mulch generously to a depth of no less than 4 inches deep and four feet wide for each plant.  The wider the area mulched, the more protection that you give the roots.  Soak the mulch deeply, and leave a space between the mulch and plant.  Mulch can literally burn a new plant, since it creates heat as it breaks down.  Over a period of 5 to 6 years, generous mulching will turn your clay into beautiful top soil.  It will attract earthworms, which will also assist in making richer soil.

After 8 years of gardening in Appalachian clay, I have learned much about the heartaches  and miracles that can be experienced when gardening in troublesome soil.  It is a satisfying and breathtaking experience to see the results of hard work and the right plant with the right soil.  It is like a warm hug from deep within the earth.  


Jaye Lewis 
0 Comments

10 Tips for Transplanting Trees and Shrubs

7/7/2015

0 Comments

 
Trees and shrubs are long-term investments in your yard and landscape. Special care during transplanting helps them get properly established and makes the investment worthwhile. Transplant your new baby trees and shrubs correctly and they will give you years of fruit, flowers and shade. 

1. Don't plant close to a building, sidewalk or driveway. Your little baby could end up forty feet tall depending on the variety, and the roots will seek out and destroy your sidewalk or foundation in short order.
2. Don't plant where the tree or shrub will be shaded for a good part of the day by other large trees. This is especially important if you transplant in the early spring before the leaves come out. Imagine your yard in full leaf, keep the angle of the sun in mind, and then choose where to transplant the new tree or shrub.
3. Dig a big hole. This hole should be twice as wide and twice as deep as the root ball of the new plant. Replace six inches of this dirt with well-rotted manure or compost in the bottom of the hole. Place two inches of soil on top of these amendments.
4. Use a shot of nutrition when you first transplant. Ask your local greenhouse or extension service what kind of fertilizer is recommended for each specific plant. You may need something as simple as a Vitamin B Upstart. Do not over fertilize, please.
5. If your new tree or shrub came in a pot from the greenhouse, remove it from the pot by gently tapping on the bottom. Be careful to not damage the baby. If roots are growing out the bottom drainage holes, trim the pot away with a sharp knife without cutting the roots off.
6. Place the root ball in the hole with the crown at ground level (not above or below ground level). Firm the soil well around the roots but please don't step on it to compact. Water thoroughly. If the dirt settles, add more dirt on top. Keep your new tree or shrub well watered for at least the first two weeks, and then you can ease up to less frequent watering.
7. Make a “moat” around your new tree or shrub. Dig a three inch deep, 6 inch wide trench about 2 feet away from the trunk or main plant. Fill with well rotted compost if you like. This trench helps to guide water toward your plant, and you can fill it in at the end of the season.
8. Prune the new plant appropriately. Look up information on the specific transplant, or ask your greenhouse adviser or your local extension service. Some pruning is beneficial for most trees and shrubs in the first year.
9. Don't fertilize trees and shrubs in the fall. Only fertilize in the spring when they are starting new growth. Apply fertilizer after you have watered the plant thoroughly.
10. Hang a bar of hand soap on the lower branches to help keep deer and other pesky animals away. If the soap has a strong, pretty smell, it will bother the deer.

Finally, for better winter protection, give all your trees, shrubs, and perennial flowers a good drink of water just before first frost. Aim for the roots and avoid any foliage. This may help eliminate winter kill and ground heave on the new roots.
0 Comments

When is the Right Time to Prune ?

6/30/2015

0 Comments

 
Pruning trees, shrubs and woody vines is a necessity, but there are always questions regarding the right time to perform this chore. Following are some general guidelines for keeping both evergreen and deciduous shrubs tidy and in top blooming condition.
  
Spring flowering shrubs, such as the hydrangea, azalea or lilac, should be pruned immediately after they flower. This is because the plant flowers on old wood - that is, wood that grows and hardens during the summer. Pruning in the fall or winter trims off next year's flowers.
  
Summer flowering shrubs such as the butterfly bush, potentilla or the newer varieties of "everblooming" hydrangeas and lilacs can be pruned in late fall. Flower buds on these plants develop on new wood, or in the case of the Endless Summer hydrangeas, on both old and new wood, so an extensive pruning late in the season should encourage significant new growth during the spring and summer. In growing zones 4 through 6, for example, it's quite common for gardeners to chop butterfly bushes (Buddleia) all the way down to ground level and cover them with a thick layer of mulch. With the shallow roots protected from freezing, the plant springs up bushier and more floriforous the following year.
  
Once-blooming roses, such as the rugosas and many of the heirloom varieties, should be pruned fairly heavily after they bloom. Pruning, along with alfalfa tea, encourages a lot of new growth and basal breaks that result in flowering canes. Tea, floribunda and the "Knockout" roses should be pruned regularly during the growing season. Deadheading allows new flower buds to form all summer. Stop pruning roses in August, however. New growth produced in late summer or during the fall may not be hardened off enough to be able to withstand the rigors of winter weather.
  
Related to the rose family, raspberries and blackberries that are spring-bearing only should be pruned after they have borne fruit. Cane fruits bear their fruit on two year old canes; canes only produce one set of flowers and fruit. Old canes should be cut down to ground level, and the newer canes trimmed so that they produce side shoots that will eventually flower.  Ever-bearing raspberries produce two crops each year - one in spring and a second smaller crop in the fall. They produce flowers on new growth, first at the tips and then from the side shoots. Ever-bearers should be cut back to about 2 feet after the first bearing; this will stimulate the production of side shoots and will result in a larger fall crop. Many growers prefer to have only one large crop per season, and cut raspberries down to ground level every fall after the fall crop has been harvested.
  
Broad-leaved evergreens such as holly or inkberry should be pruned in early spring, just before they begin their growth spurt. Needled evergreens should only have damaged or diseased branches cut out, and this should be done in June or July after their new growth has elongated. Pine trees can have their candles pinched in order to create a fuller appearance, but no conifer should have the inactive center of the whorl trimmed. Only the yews (Taxus spp.) can withstand hard pruning.
  
Using good sharp tools not only makes the job go faster, but it also minimizes damage to the tree or shrub. Clean cuts heal more quickly than those with ragged edges. Use good quality hand pruning shears that are ergonomically designed on branches under 1" thick; move to loppers or a pruning saw for branches thicker than an inch. If any of the plant material shows signs of disease, disinfect pruning tools with a solution of chlorine bleach and water or with an alcohol-based mouthwash such as Listerine before using them on healthy plants and prior to putting them away.
0 Comments

Holly trees for the Home Landscape

6/27/2015

0 Comments

 
Holly trees are a great addition to any landscape, providing a dark green accent piece in the summer months and a splash of much needed red color in the winter. Although these trees seem to thrive with little care, there are actually a few critical steps to caring for them.
  
Watering Requirements 
Holly trees thrive in slightly moist soil and prefer as much water as possible during the first year of planting. Watering at least once per week allows the tree to develop strong roots and thrive as it gets older. Once established, holly trees do not require additional water other than what occurs with normal rain and snow. If your area experiences a drought, begin watering at least once per week until the drought subsides.
  
Fertilizing for Growth 
Holly trees like highly acidic soil, such as under or near pine trees. If they are planted in an area without acid soil you must fertilize it once per year to provide the necessary nutrients. There are special holly fertilizers that do the job very well and are applied either in early spring or in early fall. Slow-release granular fertilizers are best because they continue feeding the holly for longer periods of time.
  
Pruning for Shape 
Pruning is one of the most important parts of holly tree care. In fact, though there are many holly varieties there is no distinction between a holly bush and a holly tree. A holly tree is simply a bush that was never pruned. Once the holly attains a tree form, regular pruning is required to prevent it from transforming back into a wide bushy shape.

Just as with many other trees, the proper time to prune a holly is in winter. Start by examining the trunk of the tree and look for tiny green shoots called suckers. Prune these off as close to the trunk as possible starting at the ground and going up to the lowest branch. Afterward, paint the cut edges with a liquid designed to stop tree sucker growth so that they do not grow back.

Prune the tips of each limb using pruning shears or a hedge trimmer until it has the desired shape. The only pruning rule is not to cut lower branches shorter than the upper branches, which causes the leaves to drop thus leaving the limbs permanently bare.
  
Winterizing for Protection 
Holly trees can withstand winter temperatures well but the leaves and bark are susceptible to sunscald. To prevent this, spray a protective tree wax over the entire surface of the trunk and leaves in the early winter before temperatures drop. The wax will naturally begin to wear off in the spring. In addition, make sure to spread a 2- to 4-inch-thick layer of mulch under the tree to protect the shallow roots from freeze damage.

Holly trees are true gems in the landscape due to their beauty and hardiness. By following these steps and providing proper care for both holly trees and bushes, they will provide long lasting enjoyment in every season of the year.
0 Comments

Tree Trimming Tactics: Pruning like a Pro

6/23/2015

0 Comments


To the trained eye, the difference between a professional and amateur pruning job is obvious. Whereas the former often leaves the tree attractive, healthy and ready to resist decay, the latter yields a tree that is stressed, covered in wounds and ripe for invading pathogens.

This dichotomy is hardly unexpected -- tree pruning is more complicated than it appears at first glance. Arborists and tree care professionals spend years learning about the biology of trees and the science of maintaining them. Meanwhile, most amateur tree cutters have little experience or education about trees and their care, which manifests in myriad ways.

Improper cut placement is one of the most damaging and common mistakes amateurs make. While it is not realistic or necessary for amateurs to understand tree biology in detail, understanding the basics of branch junctions and proper cut placement will help amateurs to prune trees more like the pros do.

Branch Junction Anatomy 

When you prune a branch, the remaining stub, which now lacks bark, is vulnerable pathogens and pests. If disease or decay spread into the primary branches or trunk, the tree could die.

However, trees lose branches naturally, and they have evolved ways to cope with the problem. By taking advantage of their natural defenses, you can help ensure your tree remains healthy.

Look closely at the branch you intend to prune, and trace it back to its origin -- where it emerged from the trunk or parent branch. You will see that the base of the branch is slightly enlarged; arborists call this the "branch collar."

Trunks and branches not only grow longer, they also increase in girth. As the emergent branch and the parent branch increase their girth, the branch collar forms. Often, a ridge -- called the branch bark ridge -- forms in the center of the branch collar.

Inside the branch collar, trees have specialized areas called "branch protection zones." These areas have special chemical and physical characteristics that help protect the tree by quickly initiating the process of compartmentalization, which helps prevent decay from spreading further into the tree.  

Correct Cut Location 

Most pruning cuts should take place near branch junctions -- places that tree professionals call "nodes". This takes advantage of the tree's branch protection zones, and gives the tree the best chance for surviving. 

Find the base of the branch you intend to prune. Identify the branch collar and branch bark ridge if possible (small branches have very subtle branch bark ridges). Find the edge of the branch collar and visualize an imaginary line, encircling the branch at this point.

This imaginary line marks the approximate place at which the branch protection zone ends. You want to remove as much of the wood possible outside this boundary, but leave everything inside this boundary intact.

In other words, this imaginary line marks the final length of the stub you will leave when you have finished pruning the tree. Nevertheless, making a cut in this location is likely to harm the tree, unless you make two other cuts first.

The Three-Cut Method 

If you cut a large branch from the top, the branch's weight will cause it to fall before you finish the cut. This often causes the bottom fibers of the branch to remain intact.

When the branch falls, it pulls a long strip of bark and wood with it, leaving horrific scars down the trunk. These scars are not only unsightly; they impart significant stress on the tree and expose it to decay. In a worst-case scenario, these wounds may travel all the way down the length of the trunk.

Avoid this outcome by using the three-cut method. 

The first step is to cut halfway through the bottom of the branch, about two feet out from the imaginary line that marks the end of the branch protection zone. This cut will severe the long fibers at the bottom of the branch, and prevent them from stripping the trunk bark.

Place the second cut about 3 inches farther out on the branch than the first cut, and make this cut through the top of the branch. Cut all the way through the branch and the limb will fall. 

You are now left with a 2-foot-long stub that is still attached to the trunk or parent branch. Make the third and final cut just outside the imaginary line that marks the end of the branch protection zone. You can make this cut from either direction, as the stump is not heavy enough to strip the tree's bark. Make the final cut smoothly and at a 90-degree angle to the axis of the branch.

Once you have completed the final cut, the task is complete and you can move on to the next branch. While arborists formerly painted these stubs to protect them from decay, research has shown that this practice is unnecessary, unhelpful and, in some cases, detrimental to the tree's defense mechanisms.


0 Comments

Ornamental grasses - warm season - part 1

4/5/2015

0 Comments

 
Picture
Ornamental grasses are a nice low maintenance addition to almost any landscape. They are  easy to care for as they tend to be relatively disease and pest free. Most varieties require little watering or fertilizer. There are many different sizes and shapes to choose from.Smaller ones are often used as ground covers while larger ones can be used as ground cover while larger ones can be used as privacy hedges. Mid-sized varieties often make nice borders for landscape beds.

Warm season grasses start to grow vigorously  in the late spring  and early summer when things start to heat up. They tend to need less water  and are relatively low maintenance. Most flower in the late summer and fall. Here are  a few examples of more commonly used warm season ornamental grasses.

Picture
Andropogona gerandii - Big bluestem - Gray to blue green color. Full sun. Zone 2-7. Purple blooms. 2-3' wide & 4-6' tall.
Bouteloua gracilis - Blonde ambition blue grama - blue green color. Partial/full sun. Zone 4-9. Green flower. 1-3' tall.
Picture
Chasmanthium latifolium - Inland sea oat - bright green. Some sun/shade. Zone 3 - 8. 3' wide up to 6'+ tall.
Picture
Miscanthus sinensis - Porcupine grass - Green gold color. Full sun. Zone 4-9. 3' wide and 6' tall.
0 Comments

7 Inexpensive Ornamental Trees

4/4/2015

0 Comments

 
A short compilation of some of the more common  trees that are  used locally  in residential landscaping. These are frequently found at box stores ( Lowes, Home Depot, Rural King) & can be  bought for $20 to $30 range for trees that are 3' to 5' tall. Most are low maintenance. These are ornamental trees that are planted for their aesthetic value - usually showy flowers, fragrance or leaf color.. Each group can cover a wide range of varieties - this is just a general overview. Some groups will be broken down in greater detail in subsequent articles.
Picture
Picture
Flowering Plum - (prunus cerasifera) zone 5-8 - Dense growing 15-25 foot tree with fragrant whitish pink to light purple flowers that tend to bloom in the early spring. Thundercloud variety had reddish purple leaves.
Eastern Redbud - (Cercis canadensis) - zone 4-9 - grows up to 15 feet tall and has purple/lavender blooms. Flowers in early Spring before leaves start to grow.
Picture
Dogwood - (cornus florida) - zone 5-9 - Slow growing to about 15 feet high but can be larger in the right comditions.They generally start to bloom in April with varieties having flowers that are white pink or red.
Flowering Pear - (Pyrus calleryana) - zone 5-9 fast growing tree. Some varieties grow to 10-15 feet tall but others can go as high as 50 feet. Bright white flowers in early Spring before leaves appear Easily identified by their unique pyramidal teardrop shape.
Picture
Picture
Crabapple - (malus) zone 4-9 - These trees grow moderately - most often to around 15 feet tall and wide ( can be larger). Spring flowers that are usually white pink or red. there are many, many varieties and the newer ones tend to be disease and pest resistant.
Picture
Star Magnolia - (Magnolia stellata) - zone 4-9 - Slow growing to 15 feet tall and 10 feet wide. Very fragrant early Spring flowers that are usually white but may have a pink tinge to them.
Picture
Flowering Cherry - (Yoshino, Kwanzan, Okame)  zone 6-9 - Three common Spring blooming varieties. Very fast growing trees that can grow 20 - 40 feet tall  (usually on the lower end of this range). Pink or white flowers.
0 Comments

Ornamental grasses - cool season - part 1

11/27/2014

0 Comments

 
Ornamental grasses are a nice low maintenance addition to almost any landscape. They are  easy to care for as they tend to be relatively disease and pest free. Most varieties require little watering or fertilizer. There are many different sizes and shapes to choose from.Smaller ones are often used as ground covers while larger ones can be used as ground cover while larger ones can be used as privacy hedges. Mid-sized varieties often make nice borders for landscape beds.

Cool season grasses start to grow in the very early spring when things begin to thaw. they grow in the spring and the fall, but may go dormant in the higher temperatures of summer. Most flower in the spring or early summer. Here are  a few examples of more commonly used cool season ornamental grasses.

Picture
Alopecurus pratensis - yellow foxtail - green/yellow leaf, white flower. Grows in full   sun. Does well in most areas except for the southermost part of the U.S. Usually 1-2' high and 1-2" tall, but can get as high as 3 feet.
Picture
Calamagrostis acutiflora- El Dorado - green/ gold leaves. Grown in full sun. Zones 5a-8b. Grows up to 5' tall and 3-4' wide.
Picture
Deschampsia - tufted hair grass- green leaves, white flowers. Grows in full sun.  Zone 4 - 9. Grows to 3' tall. Needs moderate watering but is deer resistant.
Picture
Elymus magellanicus - Blue Wheat Grass- blue/green leaves, brown flowers. Grows in Full sun.  Zone 6-9.  grows 1-2' tall and 1.5-2.5' wide.
0 Comments

Ornamental grasses - cool season - part 2

11/15/2014

0 Comments

 
Picture
Ornamental grasses are a nice low maintenance addition to almost any landscape. They are  easy to care for as they tend to be relatively disease and pest free. Most varieties require little watering or fertilizer. There are many different sizes and shapes to choose from.Smaller ones are often used as ground covers while larger ones can be used as ground cover while larger ones can be used as privacy hedges. Mid-sized varieties often make nice borders for landscape beds.

Cool season grasses start to grow in the very early spring when things begin to thaw. they grow in the spring and the fall, but may go dormant in the higher temperatures of summer. Most flower in the spring or early summer. Here are  a few examples of more commonly used cool season ornamental grasses.

Festuca glauca - blue fescue - blue/ green leaf color. Partial shade, does not do well in full sun. Zone 4 - 11. Grows to 10" by 10"
Picture
Helictotrichon sempervirens - blue oat grass - blue/ green leaves, brown flower . Full sun. Zone 4- 9. Grows to 2' wide, but can be as tall as 3'. Deer resistant, but may need regular watering in hotter weather
Picture
koeleria macrantha - june grass - dark green leaves, pink flower. Full sun. Zone 3- 8. Grows to 2'. Drought tolerant, but does not do well in clay soil.
Picture
Sesleria autumnalis - autumn moor grass - green leaves, purple flower. Full sun to partial shade. Zone 5-8. Grows 18"' tall and wide.
0 Comments

7 Shrubs that Flower Early in the Spring

3/1/2013

0 Comments

 
A short gallery of shrubs that will let you know that Spring is on the way. These plants generally bloom as early as January and no later than March. These plants thrive in cooler temperatures - they will be unaffected by frost or a late snow.
Picture
Picture
Fashion Azalea - (azalea x fashion) zone 6-9 grows up to 4 feet tall and 5 feet wide. Makes a good privacy hedge. Needs water weekly, moreso in the heat of summer.
April Snow Camellia - (camellia japonica)  zone 5-9 grows in full sun to partial shade up to 8 feet tall and 5 feet wide. Very cold hearty - northernmost growing of the Camellia family.
Picture
Nanking Cherry - (prunus tomentosa) zone 3-7  grown in full sun to partial shade to at least 6 feet. Edible berries in summer follow spring flowers.
Picture
White Forsythia -  ( abeliophyllum distichum) zone 2-7  Grows in full sun to part shade up to 6 feet tall and wide. Flowers earlier than true (yellow) forsythia. Can be pruned aggressively - up to one third of the plant - to keep size smaller.
Picture

Fragrant Viburnum - (viburnum farreri ) zone 5-8  Grows in full sun or part shade and can grow quite large. Grows quite well in clay soils  and has attractive foliage in the fall.

Picture
Flowering Quince - ( chaenomeles x  superba) zone 5- 8 full sun to part shade and can grow up to 6feet tall & wide. Several varieties to choose from - flowers can be orange,  red or pink.
Picture
Golden Currant - (ribes odoratum) zone 3-8 Grows in full sun to part shade. Can grow4 to 6 feet tall and is a drought tolerant plant.
0 Comments

How & When to Prune a Crape Myrtle

10/12/2011

0 Comments

 
Crape Myrtle is an extremely suitable tree used in most landscapes to beautify the garden. Its botanical name is Lagerstroemia indica, this is a tree which is drought tolerant and can thrive where there is heat and humidity. Crape Myrtle has a lovely green flora in the spring and also has a very fascinating outline when it sheds it leaves during winter with its reddish peeling bark.


Crape Myrtle has outstanding flowers that really beautify the tree during the summer. It should be strategically planted in the landscape to create that breathtaking beauty. Though this tree is planted by various people in their yards, not all of them know how to go about the pruning process.


Correct pruning helps the tree to produce flowers earlier than the ones which have not been pruned. Pruning landscape Crape Myrtle trees involves the removal of unwanted branches to enhance the growth of new ones, which then sprout into new blooms. Other parts of the landscape tree which are removed, are the suckers which come from the base of the tree, dead branches, and all those branches growing in awkward areas and distracting the growth of the tree.

Before pruning this magnificent tree, it’s good to have an objective as to why this tree is being pruned. One of the most outstanding reasons why this landscape Crape Myrtle is pruned is to maintain well spaced main branches, which have thick barks and also to reduce the center part of the tree to enable sunlight and air to penetrate through without any hindrances.


When to prune will vary by location. If for example, one lives in warmer climates, it’s advisable to prune the Crape Myrtle tree a bit earlier at around late winter and early spring. This is because if the pruning is done in the middle of winter the new blooms may sprout and then freeze and die. On the other hand if one live in a cold climate where there is a lot of freezing, the tree should be pruned during late spring and early summer in order to detect he damages caused by the freezing winter temperatures. When appropriate pruning is practiced when this landscape tree is young there will be very minimal maintenance when the tree matures.


Deadheading the Crape myrtle is a very important process which is mostly ignored. This process includes pruning of dead old, and withered flowers from a plant as it blooms. Home owners are encouraged to deadhead  the crape myrtle tree once the flowers begin to fade to ensure that they bloom for a second time. Deadheading can be done by the use of the forefinger and thumb. However, to carry out the task professionally its recommended to use a pair of clean scissors which is sharp enough not to leave any stubs.


The home owner is required to be equipped with all the information on when and which tools to use before, carrying out the actual pruning. The first step to do is to look at the main trunks from the ground up wards and remove any suckers near the base of the tree of those which are germinating from the exposed roots of the tree. After this is done, it’s also very important to trim any growth which might be growing on the many trunks which is at least 4 feet in size. Another part of the landscape tree which needs to be taken care of is the canopy.


When the tree is growing it spreads up and forms a canopy at the top. This consists of dead branches as well as branches which are growing towards the center of the tree. It’s advisable to always prune the branches without leaving any stubs and also clear the branches which cross one another. Lastly if, the home owner wants to have a thick canopy with two times growth and many blooms, he is required to prune the stems about 6” to 12” from the main branch, if this is done correctly the stem should regenerate two new stems from the old stem, and this is a sure way of ensuring that many flowers are produced and also that the tree has a thick canopy.


0 Comments

6 Popular Flowering Pear Tree Varieties

8/4/2011

0 Comments

 
Flowering pears ( pyrus calleryana)  are very fast growing trees used in many residential landscapes. They have showy white flowers that bloom early in the Spring  before leaves appear. their pyramidal teardrop shape makes them easy to identify and they do well in the dense clay soil that is common in our area. Many varieties exist  and a few are covered below.
Picture
Picture
Aristocrat Pear - zone5-9 - One of the larger varieties of pear that grows as wide as it does tall (25'-50') .  Trunk and branches grow thicker & tree is not as susceptible to wind damage as Bradford. Purple/red leaves in the fall.
Bradford Pear - zone 5-9 - Cheapest and easiest to find of the pears & can grow to 40'. Sensitive to wind damage.  After a certain age they tend to fall apart under the weight of ice from winter storms. Red purple or yellow in the fall. There are too many other readily available and better varieties to recommend this one.
Picture
Cleveland Select - 5-9 - A smaller pear tree (20' - 30')  that tends to have more flowers than other varieties. Grows tighter and narrower than most ( to 15' width). Also has the advantage of bearing no fruit. Red and purple fall foliage. Our favorite among the pear trees.
Picture
Jack Pear - (Jaczam) - One of the smallest varieties. Dwarf Jack trees grow only to about 15'  tall and is known for its improved disease resistance. Crimson red fall foliage.
Picture
Redspire Pear - 5-9 -  Similar to Bradford in height (35' +), but grows in a narrower more defined shape. Larger flowers than other pears. Leaves have a slight red tinge to them - yellow and orange fall colors.
Picture
Autumn Blaze Pear - 4-9 - Distinguishable from other pears by its round spreading growth and may get as tall as 30' .  Known mostly for its brilliant red fall color.  It is the most cold weather tolerant of the callery pears  and is much less prone to breakage & damage from winter storms.
0 Comments

    Author

    Write something about yourself. No need to be fancy, just an overview.

    RSS Feed

    Categories

    All
    Aeration & Seeding
    Grass Seed Product Info
    Landscape
    Lawn Mowing & Lawn Care

    RSS Feed

Evansville Lawn & Landscape
lawn mowing
snow removal
Grass Planting & Lawn Repair
(812) 459-2180
Cbandsl@gmail.com
844 Hoosier Ave.
Evansville
IN
47715